Attach disk to ZFS mirror on Solaris

I have a ZFS pool (mirror) with two SATA disks on Solaris 11 running on my HP Microserver Gen8. Both of the disks are Toshiba 3T desktop disk, and they are more than 4 years old. The pool stores all my photos so I think I’d better add one more disk to back it up.

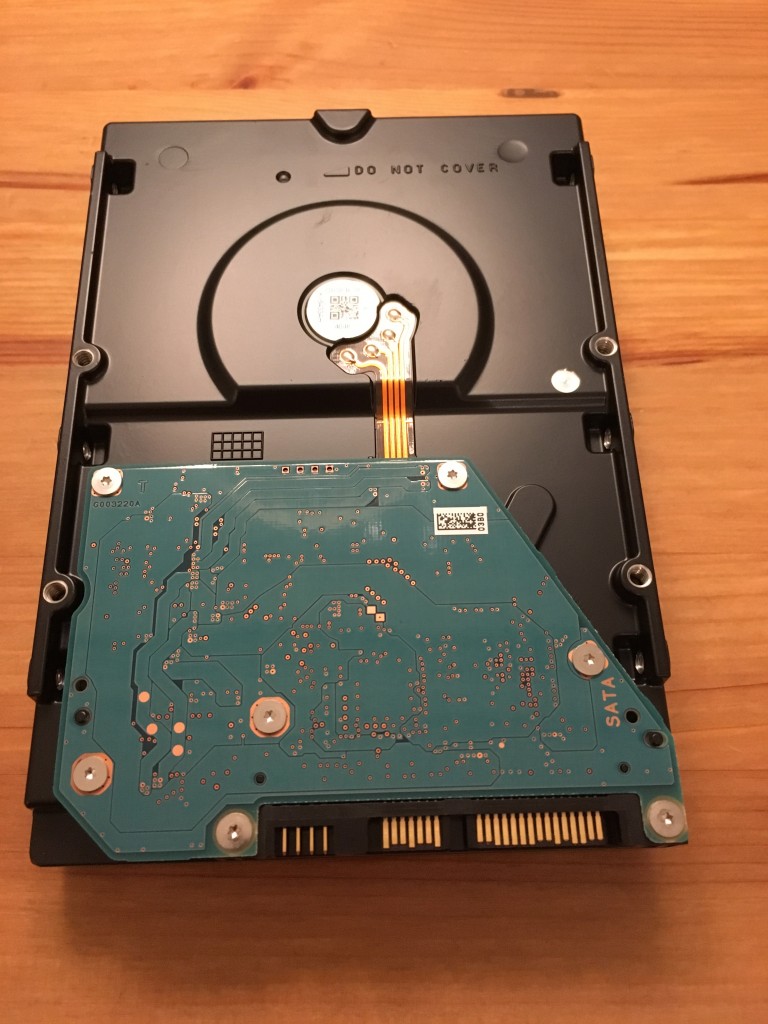
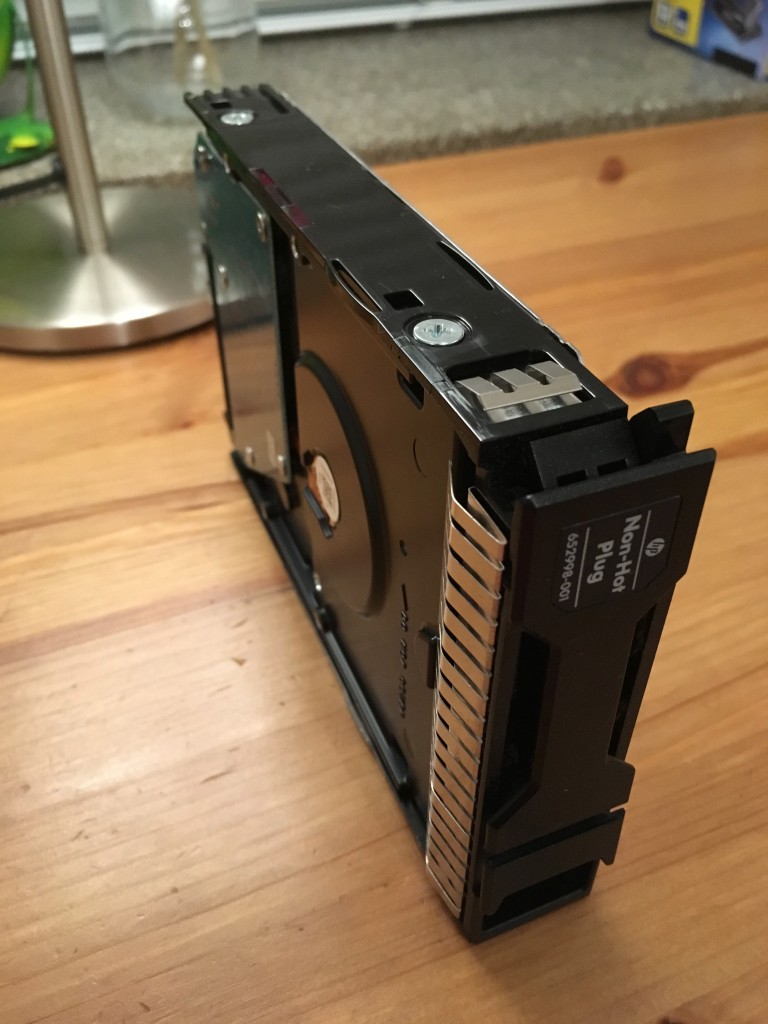
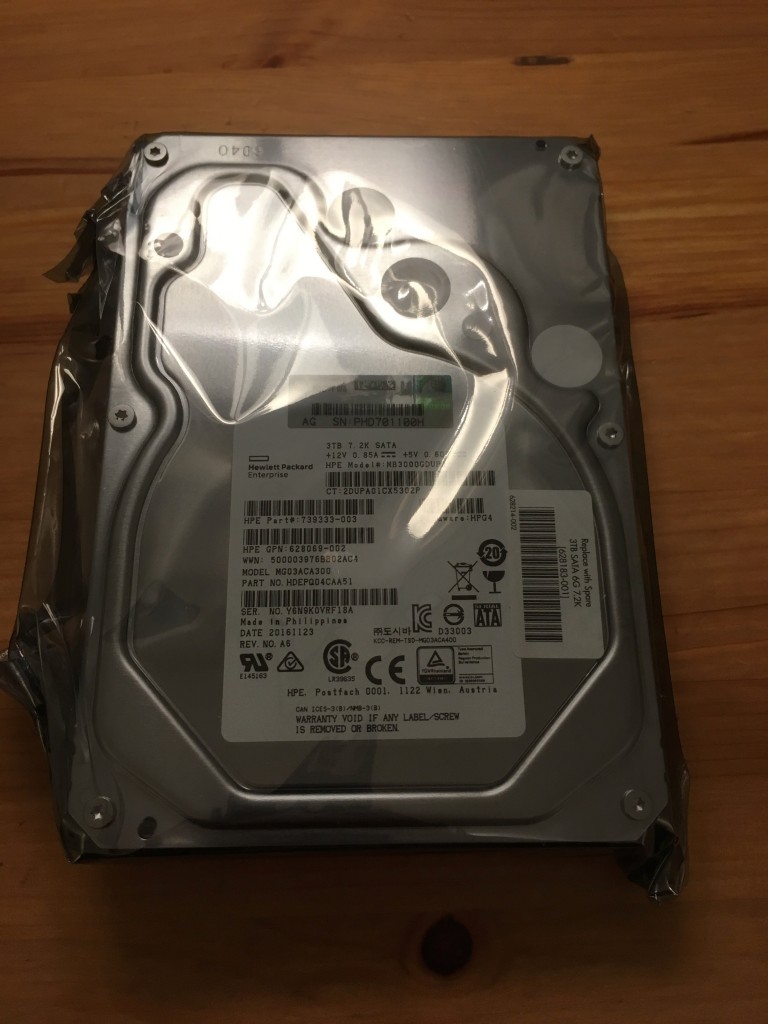
I purchased HP Disk (6G SATA Non-Hot Plug LFF (3.5-inch) Midline (MDL) Drives), which is recommended on Gen8’s Specs (628065-B21, https://www.hpe.com/h20195/v2/GetPDF.aspx/c04128132.pdf), and it comes with 1 year warranty.

HP-Disk-1

HP-Disk-2

Mount the disk to the career
HP-Disk-3-Mounted

Insert the career into Gen8 and power it on, you can see from the POST screen that the new disk is detected by Gen8.
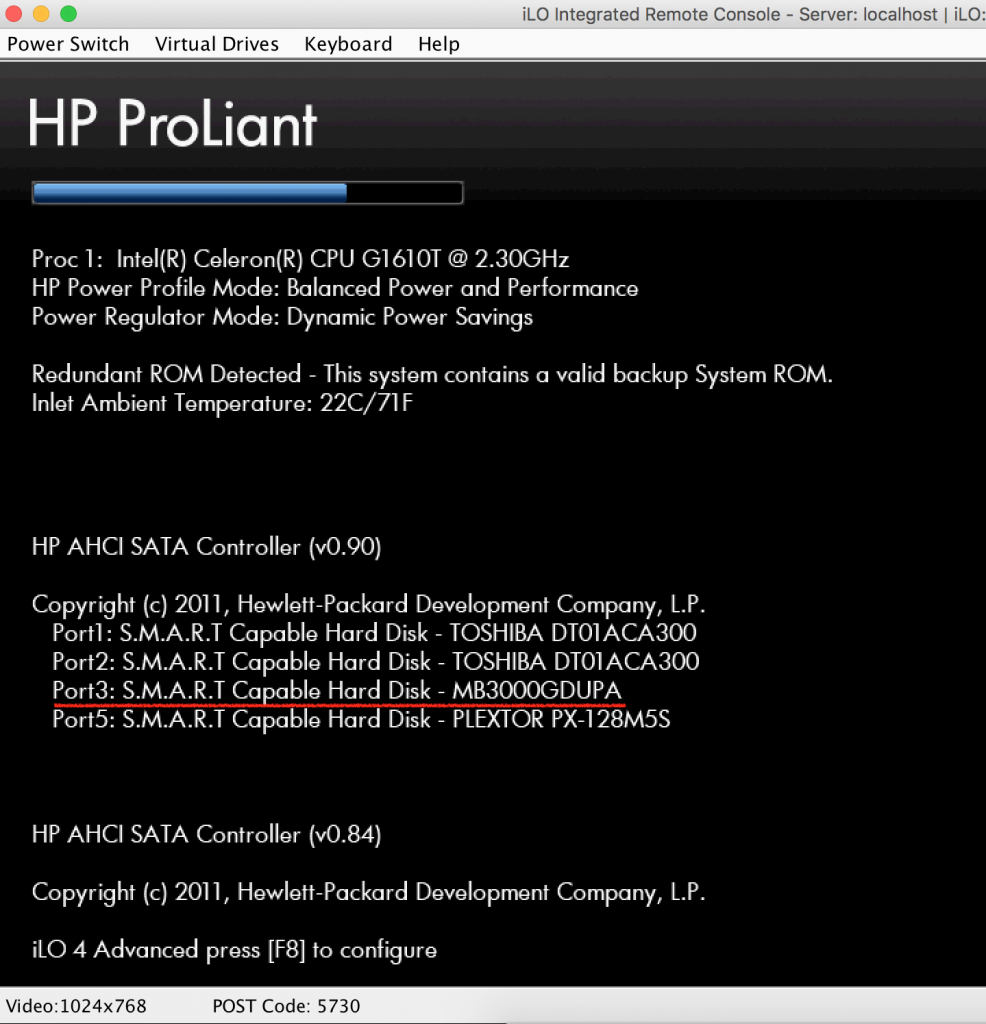
HP-Disk-4-Bootscreen

But, GNU GRUB failed to boot the Solaris.
HP-Disk-6-grub-invalid-signature

I installed Solaris 11 on my PLEXTOR SSD, which was connected the Port 5 (originally designed for Optical Drive) on MicroServer Gen8. Gen8 does not support boot directly from Port 5, but does support boot from internal Micro SD card. So I installed GNU GRUB on SD card, then boot the Solaris 11 which was installed on SSD at port 5.
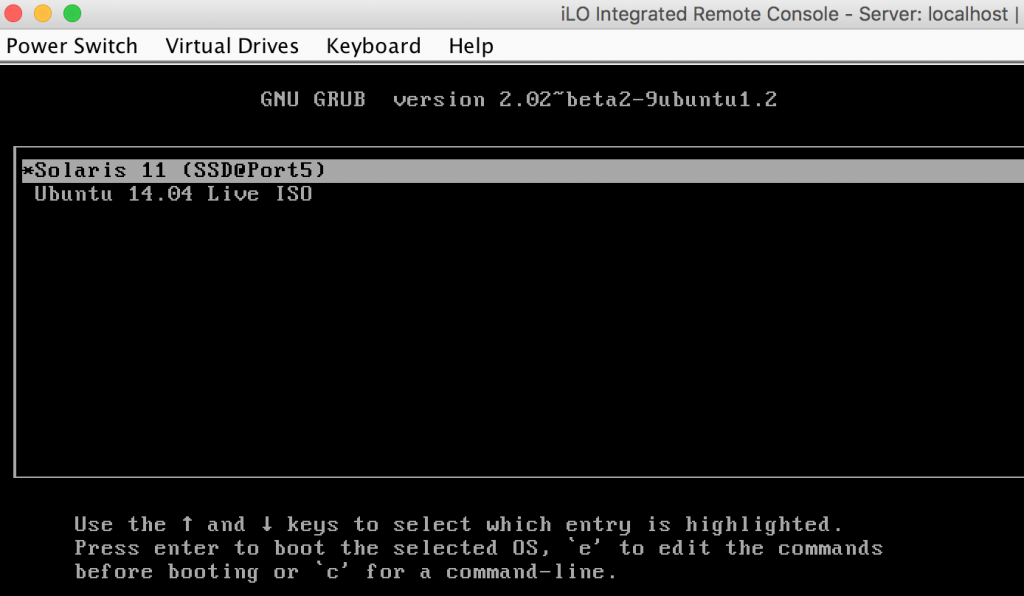
HP-Disk-5-grub-screen

Because I added a new disk, so the order of the SSD at port 5 had been changed from 3 to 4.
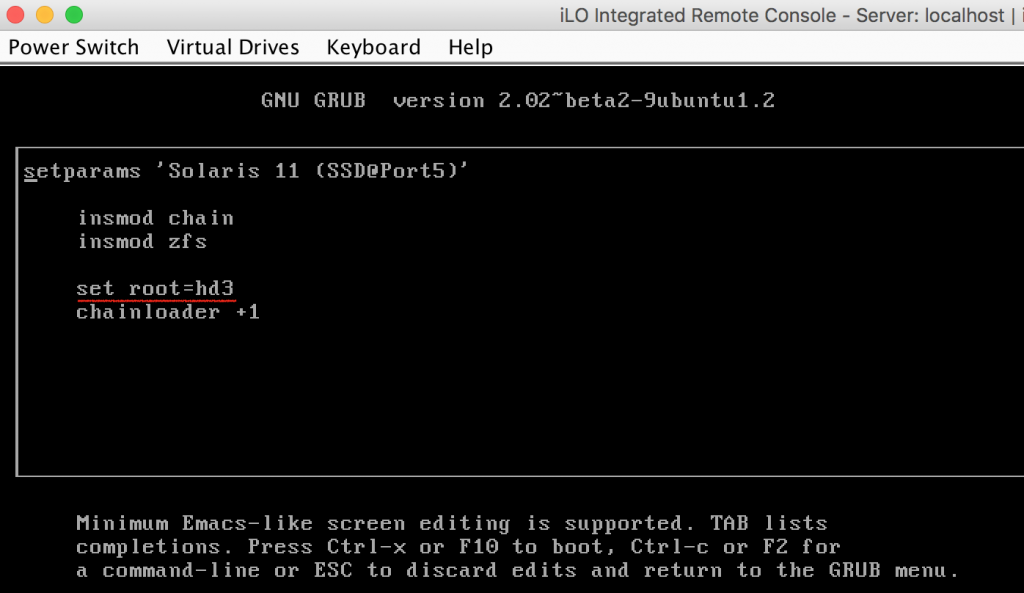
HP-Disk-7-grub-edit

The fix is simple. Power off Gen8, remove the SD card, mount it to your system (eg: Macbook), update the order number of the SSD in GRUB configuration file at /boot/grub/grub.cfg, then re-install the SD card, boot successfully!
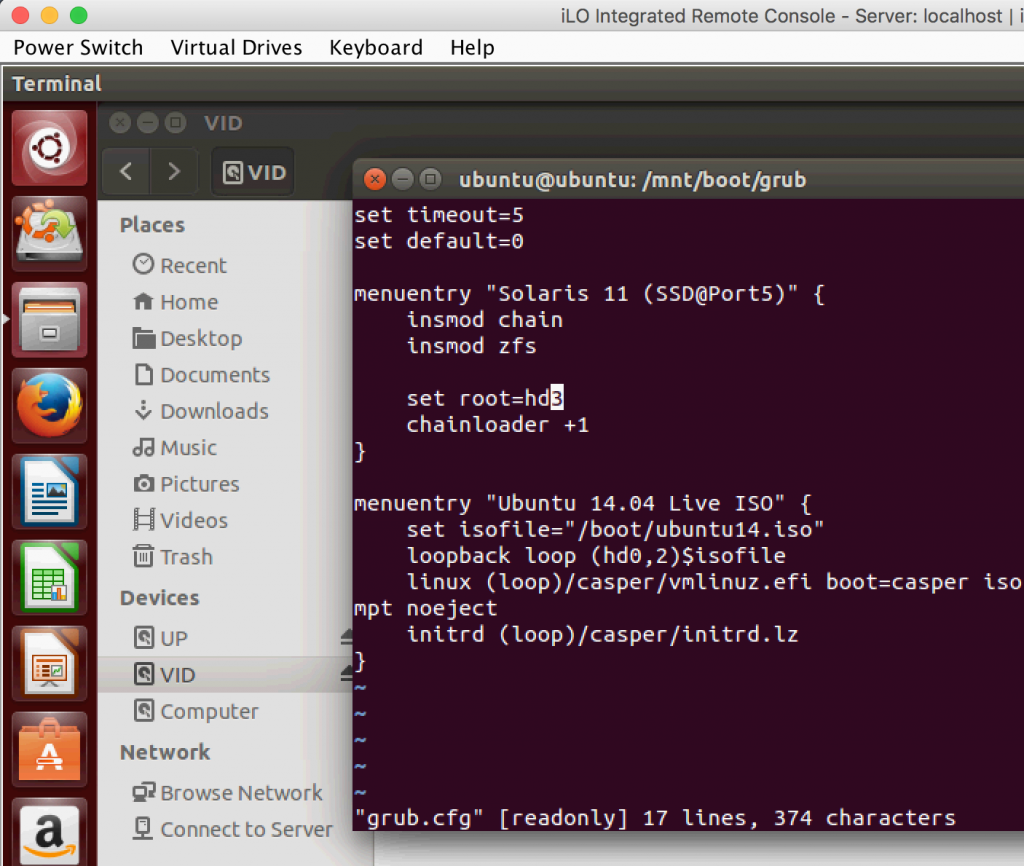
HP-Disk-8-grub-fix

After logged into Solaris, list the zpool and its status

root@solar:~# zpool list
NAME    SIZE  ALLOC   FREE  CAP  DEDUP  HEALTH  ALTROOT
rpool   118G  14.2G   104G  12%  1.00x  ONLINE  -
sp     2.72T   315G  2.41T  11%  1.00x  ONLINE  -
 
root@solar:~# zpool status
  pool: rpool
 state: ONLINE
  scan: none requested
config:
 
        NAME      STATE     READ WRITE CKSUM
        rpool     ONLINE       0     0     0
          c3t4d0  ONLINE       0     0     0
 
errors: No known data errors
 
  pool: sp
 state: ONLINE
  scan: scrub repaired 0 in 3h51m with 0 errors on Sat Aug  5 13:02:29 2017
config:
 
        NAME        STATE     READ WRITE CKSUM
        sp          ONLINE       0     0     0
          mirror-0  ONLINE       0     0     0
            c3t0d0  ONLINE       0     0     0
            c3t1d0  ONLINE       0     0     0
 
errors: No known data errors

You can see here I have one pool named *sp* which is a mirror (mirror-0) which was build over two disks, c3t0d0 and c3t1d0.

Then use format to identify the new disk.

root@solar:~# format
Searching for disks...done
 
c2t0d0: configured with capacity of 1.83GB
c2t0d1: configured with capacity of 254.00MB
 
 
AVAILABLE DISK SELECTIONS:
       0. c2t0d0 <hp iLO-Internal SD-CARD-2.10 cyl 936 alt 2 hd 128 sec 32>
          /pci@0,0/pci103c,330d@1d/hub@1/hub@3/storage@1/disk@0,0
       1. c2t0d1 </hp><hp iLO-LUN 01 Media 0-2.10 cyl 254 alt 2 hd 64 sec 32>
          /pci@0,0/pci103c,330d@1d/hub@1/hub@3/storage@1/disk@0,1
       2. c3t0d0 <ata -TOSHIBA DT01ACA3-ABB0-2.73TB>
          /pci@0,0/pci103c,330d@1f,2/disk@0,0
       3. c3t1d0 </ata><ata -TOSHIBA DT01ACA3-ABB0-2.73TB>
          /pci@0,0/pci103c,330d@1f,2/disk@1,0
       4. c3t2d0 </ata><ata -MB3000GDUPA-HPG4-2.73TB>
          /pci@0,0/pci103c,330d@1f,2/disk@2,0
       5. c3t4d0 </ata><ata -PLEXTOR PX-128M5-1.05-119.24GB>
          /pci@0,0/pci103c,330d@1f,2/disk@4,0
</ata></hp>

The disk with ID c3t2d0 is the one I just added to Gen8.

Attach the new disk into existing pool.

root@solar-1:~# zpool attach sp c3t1d0 c3t2d0

Check the status of pool again

root@solar-1:~# zpool status -v
  pool: rpool
 state: ONLINE
  scan: none requested
config:
 
        NAME      STATE     READ WRITE CKSUM
        rpool     ONLINE       0     0     0
          c3t4d0  ONLINE       0     0     0
 
errors: No known data errors
 
  pool: sp
 state: DEGRADED
status: One or more devices is currently being resilvered.  The pool will
        continue to function in a degraded state.
action: Wait for the resilver to complete.
  scan: resilver in progress since Sat Sep 30 01:30:55 2017
    315G scanned
    39.2G resilvered at 119M/s, 12.42% done, 0h39m to go
config:
 
        NAME        STATE     READ WRITE CKSUM
        sp          DEGRADED     0     0     0
          mirror-0  DEGRADED     0     0     0
            c3t0d0  ONLINE       0     0     0
            c3t1d0  ONLINE       0     0     0
            c3t2d0  DEGRADED     0     0     0  (resilvering)
 
device details:
 
        c3t2d0    DEGRADED        scrub/resilver needed
        status: ZFS detected errors on this device.
                The device is missing some data that is recoverable.
           see: http://support.oracle.com/msg/ZFS-8000-QJ for recovery
 
 
errors: No known data errors

Here it shows that the pool is *DEGRADED*, and it is resilvering, that means it is copying data from the existing disks to the new one, and it gives the size of data and estimation.

After the resilvering finished

root@solar-1:~# zpool status -v
  pool: rpool
 state: ONLINE
  scan: none requested
config:
 
        NAME      STATE     READ WRITE CKSUM
        rpool     ONLINE       0     0     0
          c3t4d0  ONLINE       0     0     0
 
errors: No known data errors
 
  pool: sp
 state: ONLINE
  scan: resilvered 315G in 0h46m with 0 errors on Sat Sep 30 02:17:11 2017
config:
 
        NAME        STATE     READ WRITE CKSUM
        sp          ONLINE       0     0     0
          mirror-0  ONLINE       0     0     0
            c3t0d0  ONLINE       0     0     0
            c3t1d0  ONLINE       0     0     0
            c3t2d0  ONLINE       0     0     0
 
errors: No known data errors

New disk had been added and synced successfully!
Configure Link Aggregations on Solaris 11 with HP PS1810

LACP – Link Aggregation Control Protocol

链路聚合成员接口管理常用的两种形式

  • 静态聚合 (Static Link Aggregation):不需要使用控制协议(i.e 不使用基于网络的协议),通过手工配置生效,当聚合口组成员端口启动后,立即生效(成为活动的成员端口)。
  • 动态LACP聚合 (LACP):需要使用链路聚合控制协议(LACP),端口通过配置加链路聚合组,但是否生效(被选中成为活动的成员端口)取决于LACP的协商结果。其中包含主动和被动两种配置。
    • Active LACP: the port prefers to transmit LACPDUs and thereby to speak the protocol, regardless of whether its counterpart uses passive LACP or not (preference to speak regardless).
    • Passive LACP: the port prefers not transmitting LACPDUs. The port will only transmit LACPDUs when its counterpart uses active LACP (preference not to speak unless spoken to).

未考证引用

“链路聚合分为动态与静态两种,静态模式的链路聚合会造成不可预料的问题,在多数情况下建议使用动态模式下的链路聚合,使用链路聚合控制协议自动去协商、评估、聚合链路。”

https://zhuanlan.zhihu.com/p/27387592

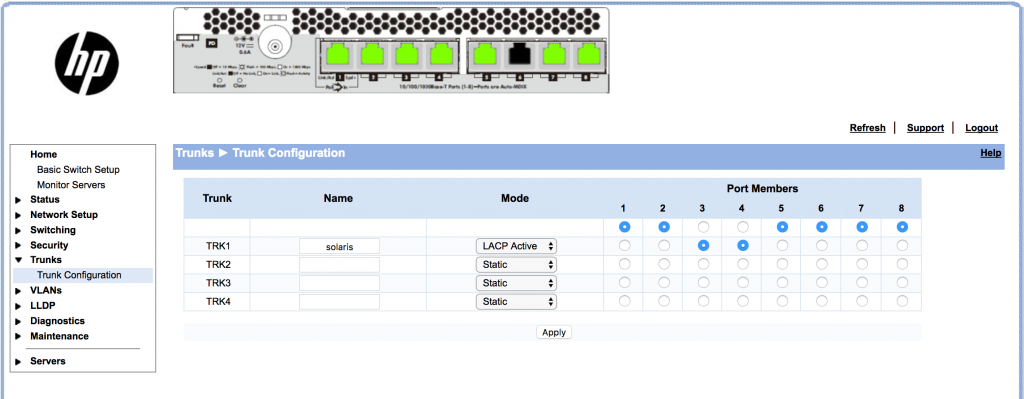
首先在PS1810交换机上配置需要使用聚合的端口,并选择LACP Active模式。
登录PS1810,切换至Trunks ► Trunk Configuration

此处设置端口3和4配置链路聚合
HP-PS1810

登录到Solaris进行配置

# list data links
root@solar-1:~# dladm show-link
LINK                CLASS     MTU    STATE    OVER
net0                phys      1500   up       --
net1                phys      1500   up       --
 
# list interfaces
root@solar-1:~# ipadm show-if
IFNAME     CLASS    STATE    ACTIVE OVER
lo0        loopback ok       yes    --
net0       ip       ok       yes    --
net1       ip       ok       yes    --
 
# remove existing interfaces
root@solar-1:~# ipadm delete-ip net0
root@solar-1:~# ipadm delete-ip net1
 
# create LAG (LACP Active) over interface net0 and net1
root@solar-1:~# dladm create-aggr -L active -l net0 -l net1 aggr0
 
# list LAG
root@solar-1:~# dladm show-aggr
LINK              MODE  POLICY   ADDRPOLICY           LACPACTIVITY LACPTIMER
aggr0             trunk L4       auto                 active       short
 
# create IP for aggr0 interface
root@solar-1:~# ipadm create-ip aggr0
 
# list interfaces
root@solar-1:~# ipadm show-if
IFNAME     CLASS    STATE    ACTIVE OVER
lo0        loopback ok       yes    --
aggr0      ip       down     no     --
 
# list data links
root@solar-1:~# dladm show-link
LINK                CLASS     MTU    STATE    OVER
net0                phys      1500   up       --
net1                phys      1500   up       --
aggr0               aggr      1500   up       net0 net1
 
# create address for aggr0 with DHCP
root@solar-1:~# ipadm create-addr -T dhcp aggr0
aggr0/v4a
 
# if you want to static address: ipadm create-addr -T static -a 192.168.1.120/24 aggr0/v4
 
# list addresses
root@solar-1:~# ipadm show-addr
ADDROBJ           TYPE     STATE        ADDR
lo0/v4            static   ok           127.0.0.1/8
aggr0/v4a         dhcp     ok           192.168.1.4/24
lo0/v6            static   ok           ::1/128

测试
从Solaris上拷贝一个较大的文件,传输过程中拨掉任意一根网线,均不会影响拷贝。

参考:
https://www.thomas-krenn.com/en/wiki/Link_Aggregation_and_LACP_basics#Static_Link_Aggregation
https://zhuanlan.zhihu.com/p/27387592
https://docs.oracle.com/cd/E37934_01/html/E36609/gkaap.html#gafxi

Install and configure Apple Time Machine service on Solaris

I installed Netatalk on Solaris to backup my Macs, it works perfectly!

Here is the steps,

1. install bdb, this is needed by netatalk

cd build_unix
../dist/configure
make
make install

2. install nettalk by running configure, make, make install

3. prepare disk. create the filesystem in ZFS and mount

zfs create -o mountpoint=/sp/timemachine sp/timemachine
zfs create -o mountpoint=/sp/timemachine/yang sp/timemachine/yang

4. configure Netatalk: afp.conf

; Netatalk 3.x configuration file
 
[Global]
hostname = Solar
mimic model = RackMac
 
; [Homes]
 
; [My AFP Volume]
 
[yang]
path = /sp/timemachine/yang
valid users = yang
time machine = yes

5. enable service

svcadm enable multicast
svcadm enable svc:/system/avahi-bridge-dsd:default
svcadm enable netatalk

Import ZFS storage pool

I had one ZFS storage pool (mirror) on my old home server, which hosts my all photos, code, and some movies. I recently bought a new HP Gen8 Microserver, installed Solaris 11 on it, now I need to import the ZFS pool to my new Gen8 server.

The first thing is simply, just remove the disks from the old server, and attach them to the Gen8, then in Solaris on Gen 8:

1. Check the current zfs storage by using zfs list

root@solar:/# zfs list
NAME                              USED  AVAIL  REFER  MOUNTPOINT
rpool                            9.99G   106G  4.64M  /rpool
rpool/ROOT                       2.78G   106G    31K  legacy
rpool/ROOT/solaris               2.78G   106G  2.47G  /
rpool/ROOT/solaris/var            309M   106G   307M  /var
rpool/VARSHARE                   2.53M   106G  2.44M  /var/share
rpool/VARSHARE/pkg                 63K   106G    32K  /var/share/pkg
rpool/VARSHARE/pkg/repositories    31K   106G    31K  /var/share/pkg/repositories
rpool/VARSHARE/zones               31K   106G    31K  /system/zones
rpool/dump                       5.14G   106G  4.98G  -
rpool/export                       98K   106G    32K  /export
rpool/export/home                  66K   106G    32K  /export/home
rpool/export/home/yang             34K   106G    34K  /export/home/yang
rpool/swap                       2.06G   106G  2.00G  -

2. list all ZFS storage pool which can be imported by using zpool import without any pool name

root@solar:/# zpool import
  pool: sp
    id: 4536828612121004016
 state: ONLINE
status: The pool is formatted using an older on-disk version.
action: The pool can be imported using its name or numeric identifier, though
        some features will not be available without an explicit 'zpool upgrade'.
config:
 
        sp          ONLINE
          mirror-0  ONLINE
            c3t0d0  ONLINE
            c3t1d0  ONLINE

Here we can see a ZFS pool named ‘sp’ can be imported. It is a RAID 1 pool (mirror).

3. before importing, create folder to mount the pool which will be imported

root@solar:/# mkdir /sp

4. import the pool by using zpool import #POOL_NAME

root@solar:/# zpool import sp

5. check the imported pool and ZFS

root@solar:/sp/important/photo/All# zpool list
NAME    SIZE  ALLOC   FREE  CAP  DEDUP  HEALTH  ALTROOT
rpool   118G  9.77G   108G   8%  1.00x  ONLINE  -
sp     2.72T   284G  2.44T  10%  1.00x  ONLINE  -
 
 
root@solar:/sp/important/photo/All# zfs list
NAME                              USED  AVAIL  REFER  MOUNTPOINT
...
sp                                284G  2.40T   152K  /sp
sp/important                      284G  2.40T   168K  /sp/important
sp/important/code                63.3G  2.40T  63.3G  /sp/important/code
sp/important/movie               31.4G  2.40T  31.4G  /sp/important/movie
sp/important/photo                190G  2.40T   190G  /sp/important/photo

Enable SMB share on Solaris 11

# 1. enable smb share
zfs set share=name=iMovie,path=/sp/important/movie,prot=smb sp/important/movie
zfs set sharesmb=on sp/important/movie
 
# 2. start server
# svcadm enable network/smb/server
# svcadm enable network/smb/client
 
svcadm enable -r smb/server
 
# 3. enable user
smbadm enable-user user1
 
# 4. vi /etc/pam.d/other
password required       pam_smb_passwd.so.1 nowarn
 
# 5. change password for user1
passwd user1

How to remove share name for smb on Solaris 11

Created several share name on same zfs system, here is the way to remove

root@solar:/etc/pam.d# zfs get share sp/important/movie
NAME                PROPERTY  VALUE  SOURCE
sp/important/movie  share     name=none,path=/sp/important/movie,prot=smb  local
sp/important/movie  share     name=iMovie,path=/sp/important/movie,prot=smb  local
sp/important/movie  share     name=movie,path=/sp/important/movie,prot=smb  local
root@solar:/etc/pam.d# share -F smb -A
none    /sp/important/movie     -       
iMovie  /sp/important/movie     -       
movie   /sp/important/movie     -       
# -------------- DELETE --------------------
root@solar:/etc/pam.d# unshare -F smb movie
root@solar:/etc/pam.d# unshare -F smb none
 
root@solar:/etc/pam.d# share -F smb -A
iMovie  /sp/important/movie     -       
 
root@solar:/etc/pam.d# zfs get share sp/important/movie
NAME                PROPERTY  VALUE  SOURCE
sp/important/movie  share     name=iMovie,path=/sp/important/movie,prot=smb  local